Do you know about the precision machining process of mold manufacturing?
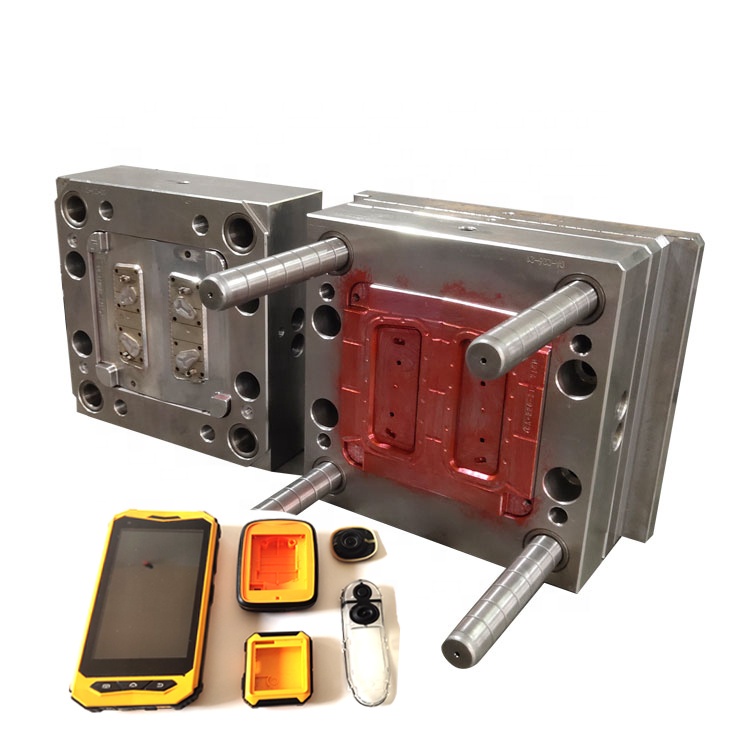
A mold is composed of numerous components, and the quality of the components directly affects the quality of the mold. The final quality of the components is guaranteed by precision machining, so controlling precision machining is crucial. In most domestic mold manufacturing enterprises, the methods used in the precision machining stage are generally grinding, electrical machining, and fitter treatment. At this stage, it is necessary to control many technical parameters such as part deformation, internal stress, shape tolerance, and dimensional accuracy. In specific production practice, there are many operational difficulties, but there are still many effective experience methods worth learning from it.
The processing of mold parts can be roughly divided into three categories based on their appearance and shape: plate type, special-shaped parts, and shaft type. The common process is roughly as follows: rough machining - heat treatment (quenching, tempering) - precision grinding - electrical machining - fitting (surface treatment) - assembly processing
1. Heat treatment of parts
The heat treatment process of parts requires control of internal stress while achieving the required hardness to ensure dimensional stability during machining. Different materials have different treatment methods. With the development of the mold industry in recent years, the types of materials used have increased. In addition to Cr12, 40Cr, Cr12MoV, and hard alloys, new materials such as powder alloy steel V10, ASP23, etc. can be selected for convex and concave molds with high working strength and harsh stress. These materials have high thermal stability and good microstructure.
For parts made of Cr12MoV material, quenching treatment is carried out after rough machining. After quenching, there is a large residual stress in the workpiece, which is easy to cause cracking during precision machining or work. After quenching, the parts should be tempered while hot to eliminate quenching stress. The quenching temperature is controlled between 900-1020 ℃, then cooled to 200-220 ℃ for air cooling, and then quickly returned to the furnace for tempering at 220 ℃. This method is called a one-time hardening process, which can achieve high strength and wear resistance, and is effective for molds with wear as the main failure form. In production, some workpieces with many corners and complex shapes are encountered, and tempering is not enough to eliminate quenching stress. Before precision machining, stress relief annealing or multiple aging treatments are required to fully release stress.
For powder alloy steel parts such as V10 and APS23, due to their ability to withstand high temperature tempering, secondary hardening process can be used during quenching. Quenching at 1050-1080 ℃ and then tempering at 490-520 ℃ multiple times can achieve high impact toughness and stability. It is very suitable for molds with blade failure as the main form of failure. Powder alloy steel has a high cost, but its performance is good, and it is forming a trend of widespread application.
2. Grinding of parts
There are three main types of machine tools used for grinding: surface grinding machines, inner and outer cylindrical grinding machines, and tool grinding tools. During precision machining and grinding, it is necessary to strictly control the occurrence of grinding deformation and grinding cracks. Even very small cracks will be exposed in subsequent processing and use. Therefore, the feed for precision grinding should be small and not large, the coolant should be sufficient, and parts with a dimensional tolerance of less than 0.01mm should be ground at a constant temperature as much as possible. According to calculations, for a 300mm long steel piece, when the temperature difference is 3 ℃, the material has 10.8 μ The variation around m is 10.8=1.2 × 3 × 3 (with a deformation of 1.2 per 100mm) μ (m/℃), each precision machining process needs to fully consider the influence of this factor.
It is very important to choose the appropriate grinding wheel for precision grinding. For the high vanadium and high molybdenum conditions of mold steel, choosing GD single crystal corundum grinding wheel is more suitable. When processing hard alloys and materials with high quenching hardness, priority should be given to using diamond grinding wheels with organic binders. The organic binder grinding wheel has good self grinding efficiency, and the roughness of the ground workpiece can reach Ra=0.2 μ m. In recent years, with the application of new materials, CBN grinding wheels, also known as cubic boron nitride grinding wheels, have shown excellent processing effects. They are used for precision machining on CNC forming grinding, coordinate grinding machines, and CNC inner and outer circular grinding machines, with better results than other types of grinding wheels. During grinding, it is important to promptly adjust the grinding wheel and maintain its sharpness. When the grinding wheel becomes dull, it may slide and squeeze on the surface of the workpiece, causing surface burns and a decrease in strength.
The processing of plate parts is mostly done using a flat grinder, and a long and thin part is often encountered during processing, which is difficult to process. Due to the adsorption of magnetic force during processing, the workpiece undergoes deformation and adheres closely to the surface of the worktable. When the workpiece is removed, it undergoes recovery deformation, and the thickness measurement is consistent, but the parallelism does not meet the requirements. The solution can be to use magnetic isolation grinding. During grinding, an equal height block is placed under the workpiece, and all four blocking blocks are used to resist it. When processing, small feed and multiple light knives are used. After processing one side, there is no need to place an equal height block, and the workpiece can be directly adsorbed for processing, which can improve the grinding effect and meet the parallelism requirements.
Axis parts have a rotating surface and are widely processed using internal and external cylindrical grinders and tool grinders. During the machining process, the head frame and tip are equivalent to busbars. If there is a jumping problem, the processed workpiece will also have this problem, which affects the quality of the parts. Therefore, it is necessary to do a good job of testing the head frame and tip before machining. When grinding the inner hole, the coolant should be fully poured into the grinding contact position to facilitate the smooth discharge of the grinding. When processing thin-walled shaft parts, it is best to use a clamping process table, and the clamping force should not be too large, otherwise it is easy to produce "inner triangle" deformation on the circumference of the workpiece.
3. EDM&WEDM machining control
Modern mold factories cannot lack electrical machining, which can process various types of irregular and high hardness parts. It is divided into wire cutting and electrical discharge.
The machining accuracy of slow wire cutting can reach ± 0.003mm, and the roughness is Ra0.2 μ M. At the beginning of processing, it is necessary to check the condition of the machine tool, check the deionization degree of water, water temperature, verticality of the wire, tension and other factors to ensure a good processing state. Wire cutting is the process of removing machining from a single piece of material, which disrupts the original stress balance of the workpiece and easily causes stress concentration, especially at corners. Therefore, when R<0.2 (especially sharp corners), improvement suggestions should be proposed to the design department. The method for dealing with stress concentration during processing can use the principle of vector translation. Before precision machining, a margin of about 1mm is left, and the rough shape is pre processed before heat treatment to release the processing stress before precision machining, ensuring thermal stability.
When processing convex molds, careful consideration should be given to the selection of the cutting position and path of the wire. The best effect is achieved through punching and threading processing. High precision wire cutting processing usually involves four cutting passes to ensure the quality of the parts. When machining a concave die with a taper, with a fast and efficient attitude, the first rough machining of the straight edge, the second taper machining, and then the fine machining of the straight edge can be carried out without the need for X-segment vertical precision machining. Only the straight edge of the cutting edge can be precisely machined, which not only saves time but also costs.
Electrical discharge machining requires the production of electrodes, which can be coarse or fine. Precision machining of electrodes requires good shape compliance, and it is best to use CNC machine tools to complete the machining. In terms of material selection for electrodes, copper electrodes are mainly used for general steel processing. The Cu-W alloy electrode has good comprehensive performance, especially with significantly lower consumption during processing compared to copper. Combined with sufficient flushing fluid, it is very suitable for precision machining of difficult to machine materials and complex cross-sectional shapes. When making electrodes, it is necessary to calculate the gap and number of electrodes. When processing large areas or heavy electrodes, the workpiece and electrode clamps should be firm to ensure sufficient strength and prevent loosening during processing. When performing deep step machining, attention should be paid to the loss of electrodes and arc discharge caused by poor liquid discharge.
4. Surface treatment and assembly
The cutting marks and grinding marks left on the surface of the parts during processing are places of stress concentration and the source of crack propagation. Therefore, after processing, it is necessary to strengthen the surface of the parts and eliminate processing hazards through fitter polishing. Bluff off some edges, sharp corners, and holes of the workpiece and R-turn them. Generally, machined surfaces will produce 6-10 μ The metamorphic hardening layer of about m is grayish white in color, brittle and has residual stress. Before use, the hardening layer should be fully eliminated by surface polishing and polishing to remove the hardening layer.
In the process of grinding and electrical machining, the workpiece will have a certain degree of magnetization, with weak magnetic force, which is very easy to attract some small things. Therefore, before assembly, the workpiece should be demagnetized and the surface should be cleaned with ethyl acetate. During the assembly process, first refer to the assembly drawing, find all the parts, and then list the equipment sequence between each part, and list all the precautions to be taken. Then, start assembling the mold. Generally, first install the guide pillar guide sleeve, then install the mold frame and the convex and concave molds, and then adjust the gaps, especially the gaps between the convex and concave molds. After assembly is completed, mold inspection should be carried out and an overall situation report should be written. For the discovered problems, reverse thinking can be used, that is, from the later process to the previous process, from precision machining to rough machining, checking one by one until the crux is identified and the problem is solved.
Practice has proven that good precision machining process control can effectively reduce parts exceeding tolerance and scrapping, and effectively improve the one-time success rate and service life of molds.


